What this exercise trains
Bridges and kickbacks emphasise hip extension, the action of moving the thigh back or lifting the pelvis from a bent-hip position. The glutes contribute strongly, with the hamstrings and trunk also participating according to the setup.
A floor bridge is simple to begin; a loaded hip thrust offers more room to progress resistance. Pair one with a squat and a leg curl when you want a leg session that includes both hip extension and bending and straightening the knees.
Hip Thrust
Supporting the upper back on a bench gives the pelvis more room to travel than a floor bridge. It is useful for progressively loaded glute work. Arrange stable support and comfortable padding, and finish by extending the hips without forcing a larger back arch.
- Rest your upper back against a stable bench, plant your feet, and position any padded bar across your hips.
- Lift your pelvis until shoulders, hips, and knees align, keeping ribs down, then lower without arching your lower back.
Loading connects to YouTube and sends your IP address and technical data to Google. The written guide works without the video.
PrivacyTechnique points to remember
Finish by extending the hips without leaning back through your lower spine. If feet slide or the back drives the lift, reset foot distance and load.
Start easier, progress deliberately
A floor bridge shortens the range and simplifies learning. For hip thrusts, secure the bench; add weight after you can hold a stable top position.
Where this exercise fits in your workout
When glutes are your priority, hip thrusts can come early; otherwise, put them after squats. Start with one bridge variation rather than filling the same session with several very similar exercises.
Warm up with easier sets before these working sets.
| Exercise | Sets | Repetitions, duration or distance | Rest |
|---|---|---|---|
| Glute Bridge | 2 | 10–12 repetitions | 2 to 3 minutes, longer if needed |
Glute Bridge
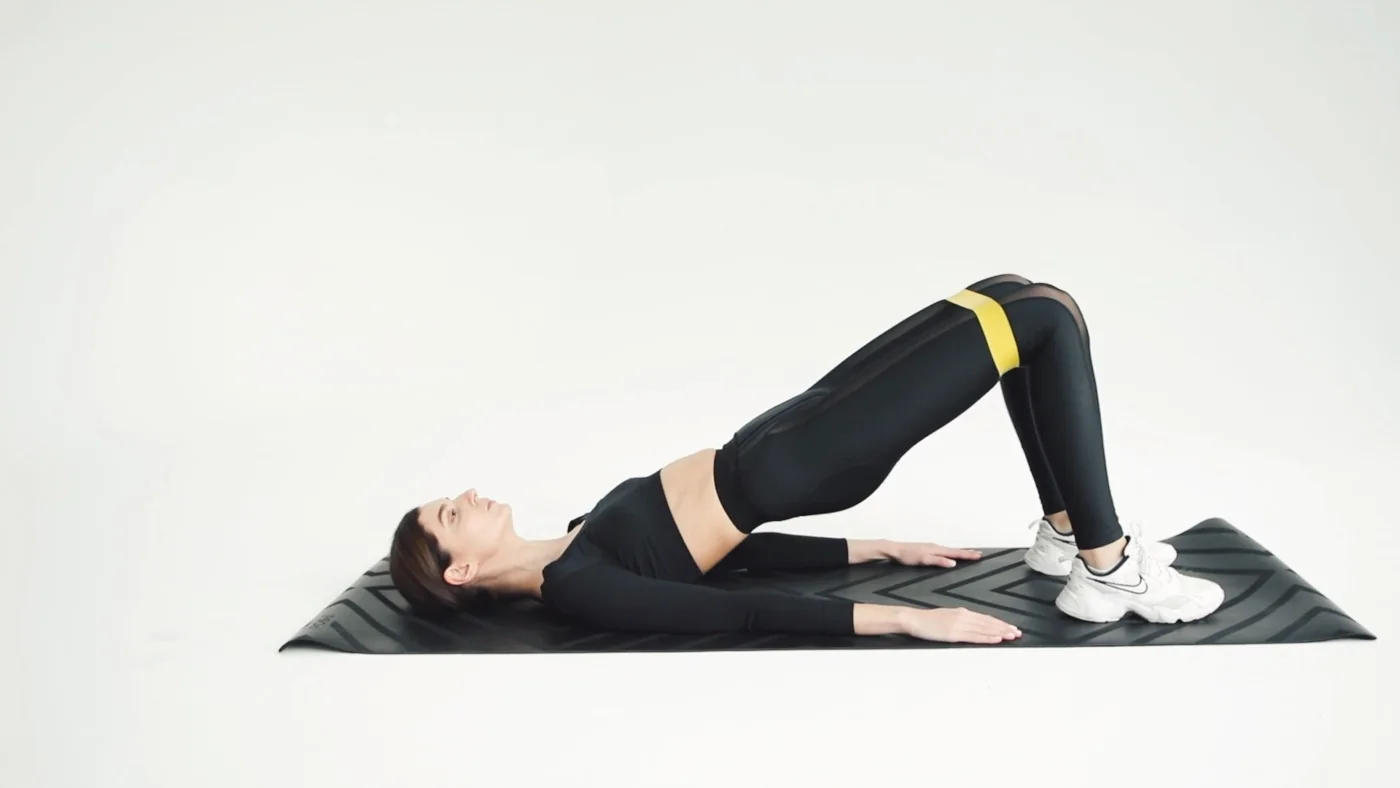
The shoulders stay on the floor while the pelvis rises, keeping the setup simple and the movement comparatively short. It is useful for learning hip extension at home. When bodyweight repetitions become easy, add a manageable load or another appropriate variation.
- Lie on your back with bent knees and feet flat about hip-width apart.
- Press through your feet to lift your hips, squeeze your glutes without arching your lower back, then lower slowly.
Single-Leg Glute Bridge
One foot supports the bridge, increasing the demand on that hip and on keeping the pelvis level. It offers progression without needing a heavier weight. If the pelvis twists or hamstring cramping dominates, return to two feet and reassess the setup.
- Lie on your back with one foot planted and the other knee drawn toward you.
- Lift your hips using the planted leg, then lower slowly; keep your pelvis level and return to two feet if you cannot control it.
Frog Pump
The soles meet and the knees open during a short bridge, changing the position of the hips. It can provide a comfortable variation for focused glute sets. Let the knees open within a natural range that you can control without forcing them toward the floor.
- Lie on your back with soles together and knees comfortably open.
- Press through the outer edges of your feet to lift your hips, then lower slowly; squeeze your glutes without forcing your knees down or arching your lower back.
Glute Kickback
Moving the leg backward against a cable or machine adds hip-extension work without lifting a bar. It suits focused accessory sets. Keep the resistance small enough that the pelvis stays controlled; turning it into a large trunk movement changes the task.
- Start on hands and knees with your trunk steady and one knee bent.
- Lift that heel backward and upward by extending your hip, stopping before your lower back arches; lower and switch sides.
Donkey Kick
Starting on hands and knees lets you practise moving one bent leg behind while the trunk stays relatively still. It needs little equipment and fits home sessions. The range should come from the hip rather than chasing height through the lower back.
- Start on hands and knees with your hands under shoulders and one knee bent.
- Lift that foot toward the ceiling by moving at the hip, then lower; keep your pelvis level and stop before your lower back arches.
Try a tool
Read next
Sources
- ACE: Strength Training the Glutes ↗
- ACSM (2026): Resistance Training Prescription for Healthy Adults ↗
- E3 Rehab Exercise Library: Hip Thrust ↗
Polina Tankilevitch / Pexels · Pexels License · Resized and converted to WebP for this website.
MART PRODUCTION / Pexels · Pexels License · Resized and converted to WebP for this website.
RDNE Stock project / Pexels · Pexels License · Resized and converted to WebP for this website.
Andrea Piacquadio / Pexels · Pexels License · Resized and converted to WebP for this website.