Where the plan fits in your week
Try session A on the floor on Tuesday and standing session B on Saturday. Keep other days for walks or your usual training. We designed this introductory sequence to practise basic positions, mobility and balance. Use a non-slip mat and place the chair against a wall. If getting up from the floor is difficult, start with session B and finish resting in the chair.
Your sessions
Work through the exercises in order. Instructions follow the two sessions. Keep breathing comfortably throughout; there is no need to hold your breath.
Session A: get moving
- Sit and breathe quietly
- Sets
- 1
- Reps / duration
- 90 sec
- Rest
- 20–30 sec
- Cat–cow
- Sets
- 2
- Reps / duration
- 6–8 slow cycles
- Rest
- 20–30 sec
- Bridge
- Sets
- 2
- Reps / duration
- 6–8 controlled reps
- Rest
- 20–30 sec
- Rest lying down
- Sets
- 1
- Reps / duration
- 2 min
- Rest
- Finish
Session B: stand steady
- Mountain pose
- Sets
- 1
- Reps / duration
- 60 sec
- Rest
- 20–30 sec
- Half downward dog at the wall
- Sets
- 2
- Reps / duration
- 20–30 sec
- Rest
- 20–30 sec
- Warrior II
- Sets
- 2
- Reps / duration
- 15–20 sec · per side
- Rest
- 20–30 sec
- Tree with wall support
- Sets
- 2
- Reps / duration
- 10–15 sec · per side
- Rest
- 20–30 sec
- Rest lying down
- Sets
- 1
- Reps / duration
- 2 min
- Rest
- Finish
How to read the repetitions and holds
For cat–cow, rounding your back and returning to a long spine counts as one cycle. For standing poses, stay in position for the listed time, then release. Two rounds per side means practising left and right, resting briefly, then repeating both. Take the time you need to change positions.
Loading connects to YouTube and sends your IP address and technical data to Google. The written guide works without the video.
PrivacySession A, step by step
- Sit on the chair or a folded blanket and let your shoulders relax. Notice your breathing for 90 seconds without deliberately making it deeper or slower.
- For cat–cow, start on all fours with hands under shoulders and knees under hips. Round your back slowly, then lengthen it again and lift your breastbone slightly. Stay within a comfortable range and avoid throwing your head back.
- For bridge, lie on your back with feet roughly hip-width apart and near your hips. Press through your feet, lift your pelvis with control, then lower it. Keep your head resting on the mat. Lift only as far as you can breathe comfortably.
- Finish with two minutes lying down, knees bent or legs extended. A folded blanket under your head may feel more comfortable. You can also sit upright and relaxed in the chair.
Session B, step by step
- For mountain pose, stand with feet hip-width apart and knees relaxed. Spread your weight across both feet and stand tall without pushing your chest forwards. Stay here for a minute.
- For half downward dog, place your hands on the wall at about shoulder height. Step back and move your hips backwards until your back and arms feel comfortably long. Your knees can stay bent. Return to standing slowly.
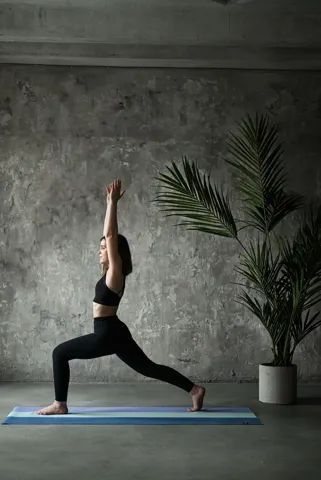
- For Warrior II, take a wide stance. Turn the front foot out and the back foot slightly in. Bend the front knee in the direction of the toes and keep your torso upright. Open your arms to the sides, or rest your hands on your hips if your shoulders tire. Choose a stance and depth that feel stable.
- For tree, keep one hand on the wall. Shift your weight onto one leg, leaving the other toes on the floor and resting that heel against your ankle. Later you can place the foot against your calf, keeping it off the knee. Change sides and finish with two minutes of seated or lying rest.
Your next four weeks
Longer holds are one option. Smoother transitions or needing less support also show that you are getting familiar with a movement.
| Week | What to practise |
|---|---|
| 1 | Learn both sequences. Start with one round of each exercise and the shorter hold times. |
| 2 | Practise A and B using the listed rounds. Keep using the wall and chair for support. |
| 3 | If everything feels comfortable, add five seconds to one hold OR add a third short session. Change just one thing. |
| 4 | Repeat the familiar sequences. Then decide whether to keep two weekly sessions or try an instructor-led beginner class. |
When a position does not suit you
| Situation | Adjustment |
|---|---|
| Pressure on hands or knees | Practise gently rounding and lengthening your back while seated. Pad your knees with a folded blanket for other floor positions. |
| Unsteady balance | Keep the toes on the floor for tree and hold the wall. Shorten your stance and hold time for Warrior II. |
| Short on time | Try one minute of quiet sitting, six slow cat–cow cycles and one minute of rest. |
| Sharp pain or dizziness | Come out of the position and stop the exercise. Have recurring symptoms assessed before trying again. |
When personal instruction is useful
If you have an injury, are pregnant or have a condition that affects movement, get the sequence adapted before starting. A qualified yoga teacher can demonstrate the poses and work with your range of motion. This introduction does not require headstands, extreme stretches or forceful breathing techniques.
How to notice progress
You may soon need less wall support in tree pose or find a comfortable sitting position more easily. Those small changes are worth noticing. Mark your yoga session as a Daily Goal in LiftPal and, if useful, note which pose you would like someone to show you. A comfortable place in your week is more useful for consistency than a harder sequence every day.
Try a tool
Read next

Sources
Mikhail Nilov / Pexels · Pexels License
ph.galtri / Pexels · Pexels License
MART PRODUCTION / Pexels · Pexels License · Resized and converted to WebP for this website.
Andrea Piacquadio / Pexels · Pexels License · Resized and converted to WebP for this website.